Contents:
- How to edit the name and description of a rule?
- How to set up filters for a rule?
- How to set up response templates?
- How to set up a schedule?
- How to enable/disable a rule?
To edit a rule, click on the Edit icon in the line of the selected rule.
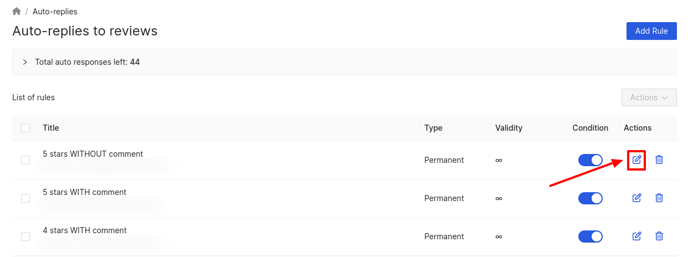
The Editing a rule page opens.
Fields marked with asterisk (*) are mandatory. 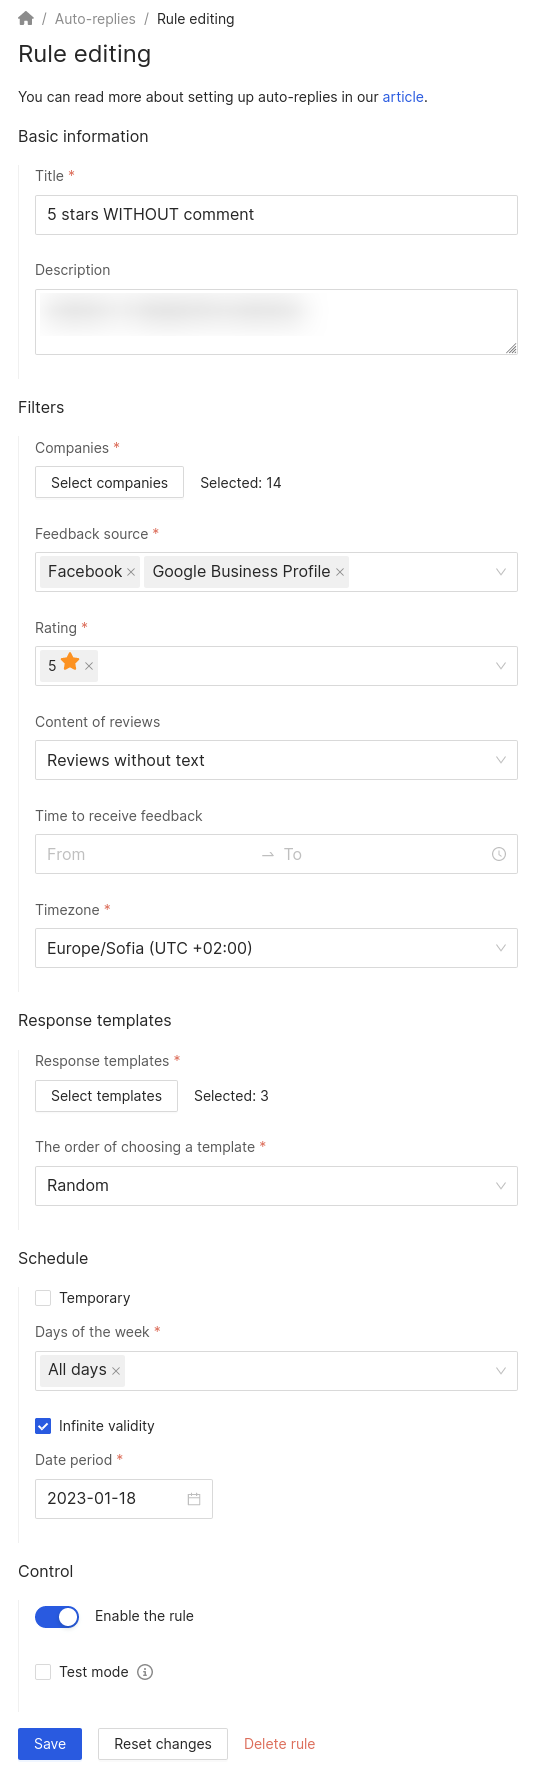
How to edit the title and description of a rule?
In the Basic information section you can enter the name and description of the rule.
Attention! The description text shall not exceed 500 characters.How to set up filters for a rule?
In the Filters section you can:
- Select companies whose reviews will receive auto-replies.
- Select the sources of reviews.
-
Select rating.
-
Select the content of reviews.
- Select the time to receive the review.
-
Select the timezone.
To choose companies, click on Select companies.

In the opened window, select the desired companies from the list and click Finish.
To find the desired company, you can use the search field by name or address, as well as filters by brands and groups.
You can view the already selected companies to understand which locations are still missing. To do this, check the box for Show only selected companies.
If the necessary companies were sorted in the top filter, they can be selected by clicking on Select from common filter. More information about this filter can be found here.
To select sources, click on Feedback source. Choose the sources you need in the drop-down list.
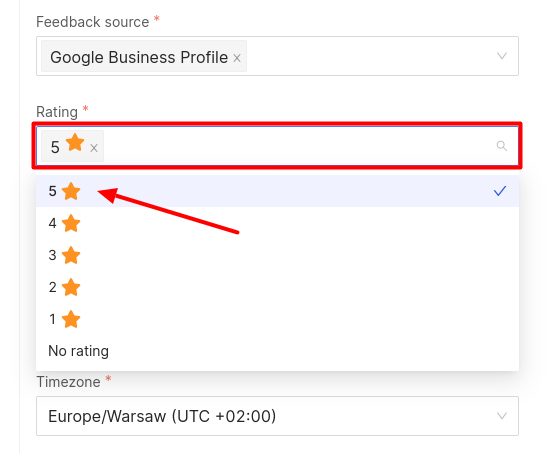
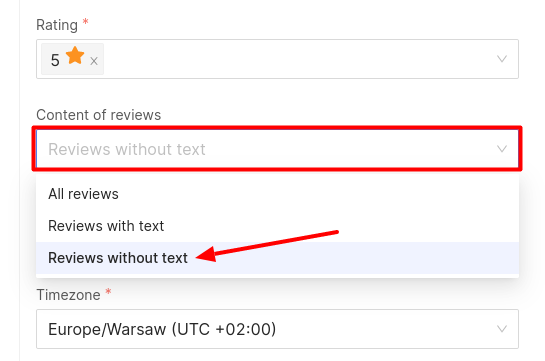
To select the rating of reviews, click on the Rating field and select the desired one from the drop-down list.
To filter by content, click on Content of Reviews and choose the necessary option from the drop-down list.
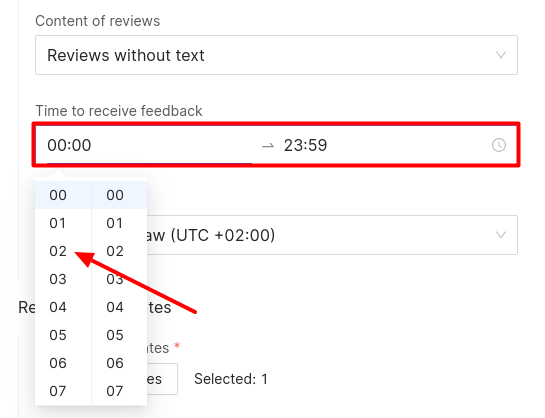
In the Time to receive feedback field, click on the Time from and Time to.
Then select the desired time from the drop-down list.
If you do not specify a time period, auto-replies will be generated around the clock.
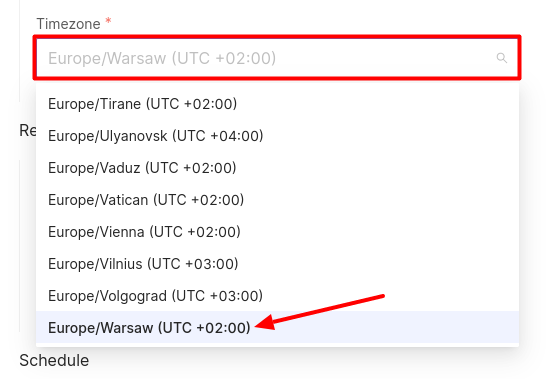
To select the timezone, click on the Timezone field, and choose the one you need from the drop-down list.
How to set up response templates?
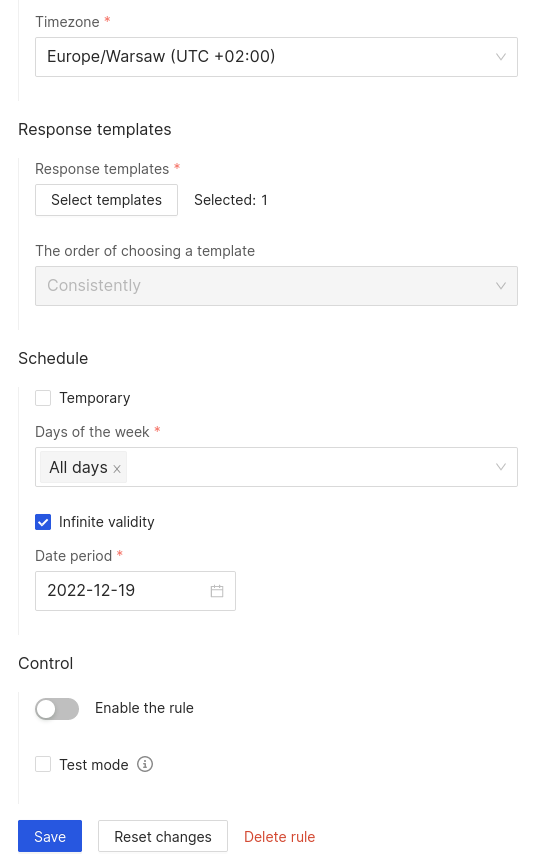
In the Response templates section you can:
- Select response templates for reviews. You can learn how to create response templates here.
- Establish the order of selecting templates.
To select templates, click on Select templates.
In the window that opens, choose templates from the list and click Apply.
Attention! If the template is private, it cannot be used. In such a case, you have to create a new one or change access to command in template settings. You can learn more about creation and access editing here and here.
To search for templates, click on the Search for Templates field, and enter the template name.
To filter by group, click on All Groups and choose the one you need from the drop-down list.
To set up templates, click Template setting. The Response templates page opens. Information on response templates can be found here.
If a new template was created when going to the Response templates section, click Update templates list after getting back to the Rule edition. After that, the template will be displayed in the list.
To select the order of choosing a template, click on The order of choosing a template and choose the option you need from the drop-down list.
Attention! This field will be available only after choosing more than one template.
How to set up a schedule?
In the Schedule section you can:
-
Set up a temporary schedule.
-
Set up infinite validity of the rule.
-
Select the days of the week.
- Select the date period.
To select the days of the week, click on the Days of the Week field, and choose the days you need from the drop-down list.
Infinite validity of the autoreply rule will be set by default. It means that its application is not limited to any period, but will be used all the time depending on the selected days of the week.
If you need to set up a certain duration of the autoreply, clear this tick box.
In the field Date period, you can:
- Choose the starting day of sending autoreplies. This setting is available if you tick the box of Infinite validity of the rule.
-
Date from is the date from which the established auto-reply rule will start working. It could be an earlier date if you want to reply to earlier reviews.
Attention!
-
If a past date is set when editing a rule, an autoresponse for old reviews might appear with a delay within a day.
- You cannot specify a date more than a year ago!
-
-
-
Choose the date period for sending autoreplies. This setting is available if you clear the tick box Infinite validity of the rule.
-
Date from is the date from which the established auto-reply rule will start working. It could be an earlier date if you want to reply to earlier reviews.
- Date to is the date until which the established auto-reply rule will work.
Attention!- If a past date is set when editing a rule, an autoresponse for old reviews might appear with a delay within a day.
- You cannot specify a date more than a year ago!
-
To set up a temporary schedule, check the box next to Temporary.
The Temporary Mode of Operation is the choice of a specific date or several dates for which the selected auto-reply conditions will work. For instance, you need to include special rules for answering machines on May holidays. The established auto-reply rule will work only on selected days.
After you tick the box, the field For dates will appear where you have to choose the days when the rule will be valid. In this case, it will be impossible to choose days of the week and period of the rule application.
Attention!
- If a past date is set when editing a rule, an autoresponse for old reviews might appear with a delay within a day.
- You cannot specify a date more than a year ago!
How to enable/disable a rule?
In the Control section you can:
-
Enable/Disable a rule.
-
Enable test mode.
To enable a rule, drag the slider to the right next to Enable the rule.
To enable test mode, check the box next to Test Mode.
In the test mode the reviews page will display auto-reply suggestions. This way, you can make sure that the settings are correct.
Attention! If the test mode is not enabled but the auto-response option is displayed, it means there was an error in sending them. After some time, the system will automatically resend the responses to the directories.
To save the rule, click on the Save button.
Attention! The rule cannot be saved if its settings overlap with the settings of an existing rule.
To cancel changes, click on Reset changes.
To delete the rule, click on Delete rule.
How to work with the list of rules, you can find out further.