In this article, you will become familiar with the following information:
- How to add a survey title?
- Setting up platforms for positive and negative feedback
- How to set up sending negative reviews to email and Telegram?
- Automatically tag reviews
- Provide a promo code to the customer for a review
- Social media settings
- Design
To create a questionnaire, click the button in the top right corner. To edit a questionnaire, click on the corresponding icon in the list.

When creating a survey, a window will open where you should select the Custom form with questions.
The Create a questionnaire page will open. On the left side of the page, you can customize the content. Text fields and catalogs are filled in by the system by default. They can be edited.
After filling out the fields, you can configure the survey scenario and add the necessary fields. You can learn more about this here.
The resulting changes can be tracked in the preview on the phone, which is located on the right side of the page. In this mode, it shows how the client will see the pages for leaving assessment and review when clicking on a QR code.
After creating the QR code, a unified code and a separate code for each company are generated for you. If clients scan the unified QR code, they will see a page where they can choose the company to evaluate.
- To view changes to the survey of individual QR codes for each company, select the From QR Code tab above the preview screen.
- To view changes to the survey of the unified QR code for all companies, select the From Multi QR Code tab. In this case, a company selection page will be added to the preview.
Attention! If you have incorrectly filled out the fields on the page, for example, by providing an incorrect email or website link, the data will not be displayed in the preview.
To switch the preview pages on the phone back and forth, you need to click on the arrows located on both sides of the preview.

How to add a survey title?
First, specify the title of the survey.
Setting up platforms for positive and negative feedback
Next, select the platforms for positive and negative reviews. By default, all catalogs will be selected.
Attention! If companies have not yet been synchronized with any platform, users will not see a button for that catalog when leaving a positive review via QR code. After synchronization, it will appear in the existing QR code. There is no need to create a new set.
- You can find out how to synchronize a company with Google here.
- You can find out how to synchronize a company with Yandex here.
- You can find out how to synchronize a company with Facebook here.
You can also add a button to your review link. In the field for your link, specify the button name (which your clients will click) and the URL of any page or website where your clients can leave their feedback. Additionally, you can add a logo, and its size should not exceed 1 MB.
Attention!
- If the option to provide a promo code for a review is selected, the promotion has not yet expired, and there are available one-time promo codes for submission, only links to catalogs will be displayed on the platform selection page for leaving a review.
- If the option Bonus for Review is not selected or the conditions for submitting promo codes are not met (for example, the promotion has expired), both links to catalogs and your own links will be displayed on the platform selection page.
Please note that your own pages may reduce the conversion rate for leaving reviews and will not improve the ranking of your locations on maps.
You can rearrange the catalogs as needed. To do this, click and hold the six dots next to the catalog with the left mouse button, then drag it to the desired position.
How to set up sending negative reviews to email and Telegram?
- To have bad feedback sent to your email, click on the slider Send bad reviews to email and enter the required email address.
-
To connect Telegram, click the toggle Send bad reviews to Telegram, then click Get chat ID. Telegram will open with the bot; click Start. You will receive the ID immediately. You must enter it in the Telegram chat ID field.
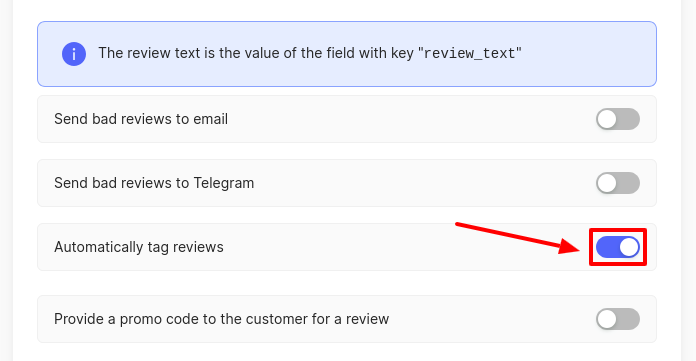
Automatically tag reviews
By default, this setting is enabled. In this case, reviews that come through QR codes or newsletters will be tagged with the corresponding tags on the Reviews page. You can read more about it here.
Provide a promo code to the customer for a review
You can set up the sending of promo codes to customers for reviews. This option is only available for reviews left on catalogs. To set this up, you first need to create a promo code. You can find out more about this here. After that, click on the toggle to Provide a promo code to the customer for a review. If the promo code has already been created, select it in the Promo Code field.
Social media settings
You can add links to your company's social media profiles.
Please note! Only the social networks that were specified when creating the company will be displayed in the survey. You can add them in the Edit Company section on your personal account page. For more details on how to edit, you can find information here.
Design
In this step, you can customize the appearance of the pages for the user to leave a rating.
If you want your logo to be displayed on the pages, click on the corresponding field to upload it.
Logo requirements:
- Recommended format .PNG.
- Maximum size 1 MB.

Next, customize the survey design by selecting corporate colors. Start by choosing the accent color.

After that, you can set the text color on the buttons in the survey.

After making the settings, you can save them for future QR codes, if necessary. Check the corresponding box.

The next time you create a new QR code, the saved settings will be displayed in the drop-down field at the beginning of the page. Click on the slider to apply the necessary setting.
Webhook for survey results
Insert the webhook link in this field. The survey data will be sent to you via this link once the client completes the survey.

You can learn how to set up the scenario and fields in the questionnaire below.