In this article, you will get acquainted with the following information:
- How to start working in the section?
- How to set the period and select the search phrase for data analysis?
In this section, it is possible to understand what needs to be changed in the company’s data to improve search results. The service stores the history of search results and makes it possible to find out the change of positions over time.
On the page you can:
-
View the list of requests for which the collection of positions is launched and understand how often it occurs.
-
Send a request to add/edit queries.
Attention! To create or edit a request, you need to contact your account manager. -
View the dynamics of changes in positions.
-
View the history of collecting positions.
-
View the result of collecting positions by key removal.
To open this section, you need to click on the Local rank tracker in the menu.

If you have not yet purchased a license for this functionality, a page will open where you can activate a free trial period for 14 days. To do this, click on Try for free.

How to start working in the section?
To work in the section, you need to complete several steps. First, select the companies for which the position data will be collected.
In the opened window, select the desired companies from the list and click Finish.
To find the desired company, you can use the search field by name or address, as well as filters by brands and groups.
You can view the already selected companies to understand which locations are still missing. To do this, check the box for Show only selected companies.
If the necessary companies were sorted in the top filter, they can be selected by clicking on Select from common filter. More information about this filter can be found here.
Then, create a rule for position tracking. To do this, fill in the fields:
- Search phrase - the phrase entered by the user during the search, as a result of which the company was displayed in the results.
- Services.
- Frequency (how often position tracking will be launched). Attention! During the trial period, only 1 position tracking will be available.
- Square size - the size of the grid, i.e., how many points will be displayed on the map. You can see how this is displayed on the map on the page to the right. Attention! During the trial period, only 1 square size will be available.
- Distance between points - this is the grid step. It can be 100m, 500m, 1000m, or 1500m.
After filling in the information, click on Start Search.
A window will open, indicating the duration of the trial period. Click on Turn on.
Next, read the brief instructions for steps 3 and 4.
Finally, click on Go to section.
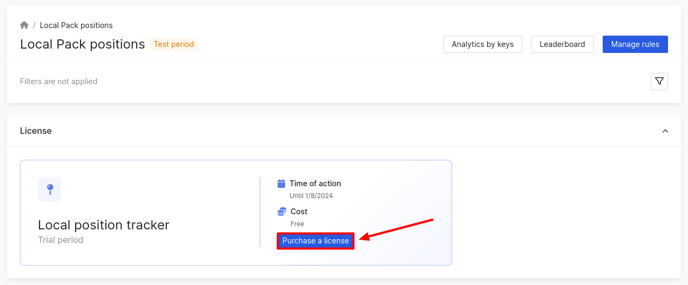
After that, the Local Pack positions page will be displayed. To purchase a license, click on the corresponding button. If you have already purchased a license, the section will open without displaying the trial period.
How to set the period and select the search phrase for data analysis?
If you want to see data for a specific company, use the top filter. You can learn more about it here.
To see data for a particular period and select a search phrase, click on the filter icon.

A window will open, where in the first field, choose the period for which the results will be displayed on the page.

Next, you can select a search phrase, which will display data based on what the client entered in the search, resulting in your company appearing in the results.
After setting all the filters, click Apply.

What is displayed in the position distribution chart, you can find out further.