In this article, you will get acquainted with the following information:
- How to specify the name, domain and select companies?
- How to set up a store locator?
- How to set up the language, the location of the list, the logo and the title of the store locator?
- How to set up filters and search?
- How to set up the color of the store locator?
- How to set up the items in the card in the list?
- How to set up the elements in the card in the pin?
- How to set up SEO metadata?
- How to set up a card?
- Preview of the store locator
- How to connect a store locator?
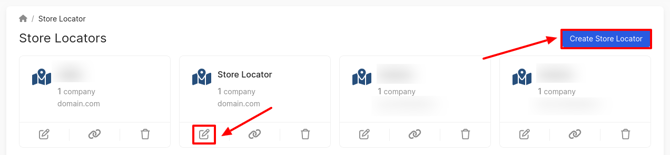
In the Store Locators, click on Create Store Locator. To modify a store locator, click on the edit icon in the selected store locator window.
The corresponding page opens with the following steps:
- Creating a locator.
- Setting up the locator.
- Setting up the card.
- Connection.
Fields marked with an asterisk (*) are mandatory.
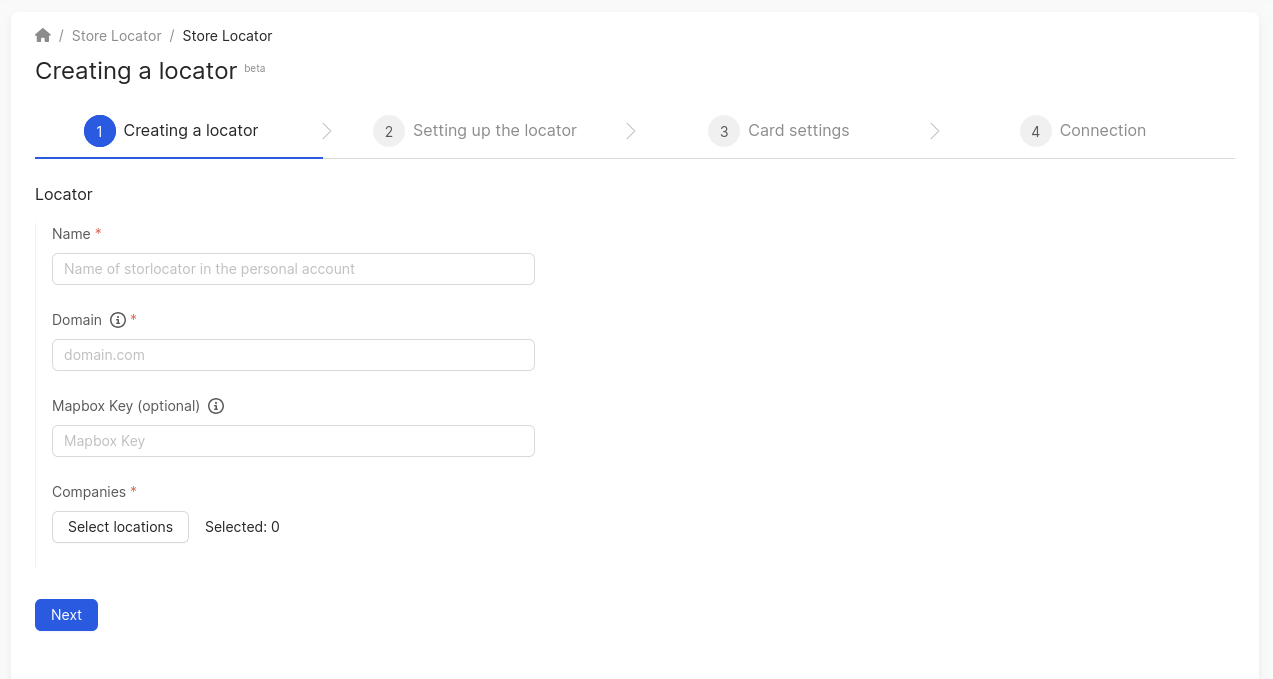
How to specify the name, domain and select companies?
- In the Name field, enter the name of the locator, which will be displayed only in the personal account on the Store Locators page.
-
In the next field, you need to enter the domain (name) of the site where the store locator will be located. The domain must be specified without transmission protocols (https://, http://). For instance, storelocator.io. On a single domain, you can create multiple storefronts with the same locations.
- If you have a Mapbox account and you want to use online maps from this service, enter the key from your account in the field. OpenStreetMap maps are used by default. How to sign up for Mapbox and get the token, you can find out
here. - In the location field, click on Select locations.
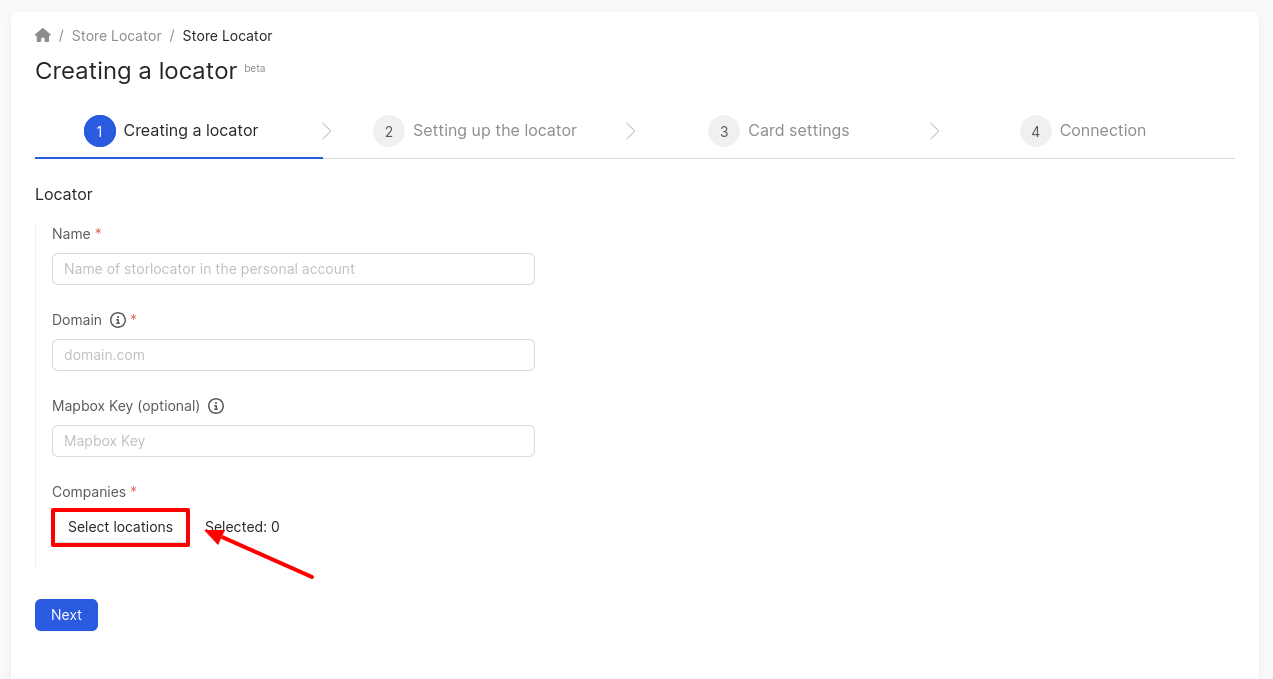
In the window that opens, select the necessary companies from the list and click Apply.
Attention!
-
You can select only active companies.
-
If a new company is added to the store locator's personal account after creation, it will not be displayed in it! You need to add a location through the locator editing page by clicking on the Select locations button. You can find out more about this here.
To find the desired company, you can use the search field for name or address, as well as the filter by brands.
After filling in the fields at this step, click Next.
If after selecting a company and clicking on Next, an error appears that not all locations are present in the store locator, you need to contact your account manager.
How to set up a store locator?
At this step, you can customize the locator display by selecting the language, company list layout, adding a logo, header, choosing background and button colors, configuring the display of location name, phone number, working hours, route building options, SEO title, search settings, and more.
Fields marked with asterisk (*) are mandatory.
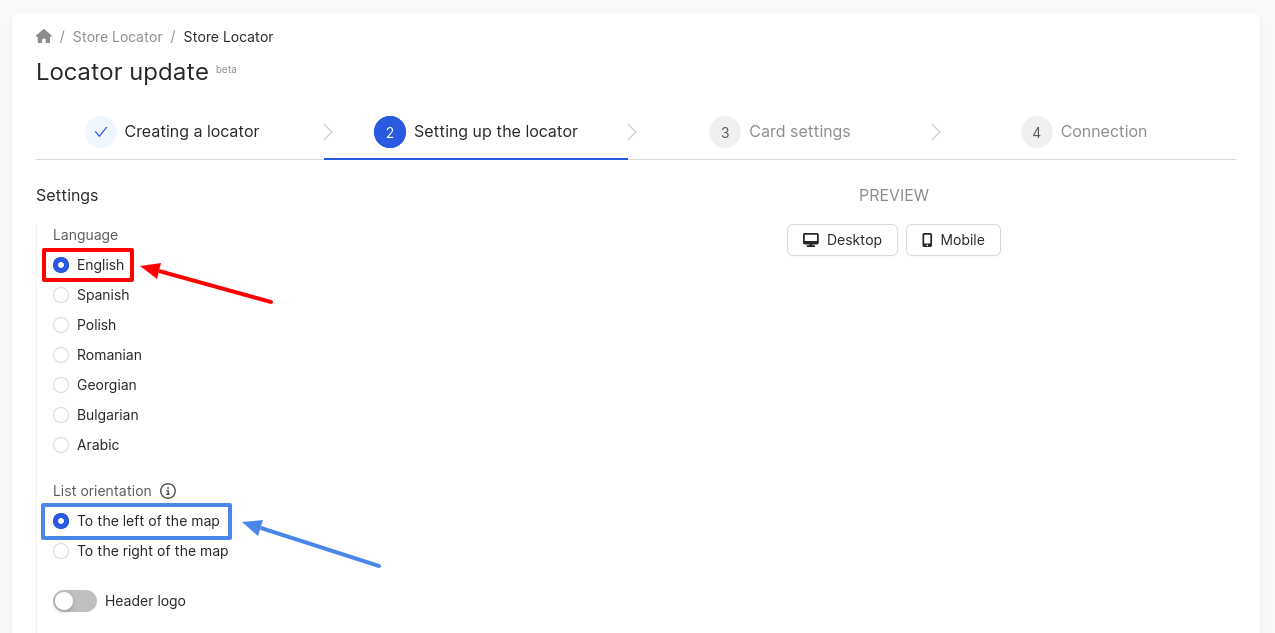
How to set up the language, the location of the list, the logo and the title of the store locator?
- To begin, select the language for the locator.
- Then, choose the arrangement of the company list (information about the company on the map).
In order for the logo to be displayed in the header of the locator, click on the corresponding slider.
Then you need to click on Upload and select the desired image.
Image format requirements:
- minimum 300x300 pixels.
- maximum 5000x5000 pcs.
- extensions .jpg .jpeg .png.
In the next field, specify the locator title. For example, the brand or network name.
How to set up filters and search?
To disable the display of search by company address in the locator, you need to click on the corresponding slider.
Attention! By default, this function is enabled, that is the slider will be blue.
How to set up the colors of the store locator?
To adjust the colors of:
-
Pin color.
-
Color for buttons.
-
Substrate color.
-
Card background color.
-
Body text and headings.
-
Secondary text.
-
Subtitles and Icons.
you need to click on the button in the appropriate field and select the option you like. You can also insert the values of your own color, which is not in the palette.
Attention! The colors are given in RGB encoding.
How to set up the items in the card in the list?
In the list that is located next to the locator, you can configure the display of the following fields:
- Location name.
- Phone number (primary only).
- Working hours (on the day of viewing).
- Button “Build route".
To disable one of the fields, click on the corresponding slider.
Attention! By default, these functions will be enabled, that is the sliders will be blue.
How to set up the elements in the card in the pin?
In the pin card you can configure the display of the following fields:
- Location name.
- Company's logo.
- Phone number (the main one only).
- “Build route" button.
To disable one of the fields, click on the corresponding slider.
Attention! By default, these functions will be enabled, that is the sliders will be blue.
How to set up SEO metadata?
SEO metadata is necessary for the site page to be well displayed in the search for potential customers. The better the metadata is written, the more likely it is that the user will click on the link to the site. Also, with the help of this information, you can figure out the content of the page.
- In the SEO Title field, you must specify the title that will be displayed in the output. Example: "Barbershop [Name] – Stylish haircuts and beard grooming." Include the name of the barber shop and key services such as haircuts and beard care.
- In the SEO Description field, you need to specify the description of the page. Example: "Book an appointment at men's barber shop [Name] for a stylish haircut and professional beard grooming. Experienced barbers are on staff. Convenient location and a friendly atmosphere." The description should briefly highlight the main services, advantages, and atmosphere of the establishment.
An example of displaying metadata in search is shown in the image below.
After filling in all the fields, click on Next.
How to set up a card?
In the Card Settings section, you can:
-
Customize the card view.
-
Customize the display of the location name, the “Build route” buttons, coordinates, working hours, breaks, payment methods, social networks.
-
Customize the SEO title and description with templates for each company.
How to customize the card view and the elements on the page?
So that when you click on the pin on the card, the company card does not open as a separate page, you need to click on the corresponding slider.
Attention! By default, this feature is enabled, that is, the slider will be blue.
In the Elements on the Page section on the page, you can configure the display of the following fields:
-
Location name.
-
“Build route" button.
-
Coordinates.
-
Working hours.
-
Breaks.
-
Payment methods.
-
Social Media.
To disable one of the fields, click on the corresponding slider.
Attention! By default, these functions are enabled, that is the sliders will be blue.
How to set up the SEO metadata of the card?
SEO metadata is necessary for the site page to be well displayed in the search for potential customers. The better the metadata is written, the more likely it is that the user will click on the link to the site. Also, with the help of this information, you can figure out the content of the page.
To display a specific location card in the store locator on your website in the search results, you can use SEO templates. When they are used, when filling in the SEO Title and SEO Description fields, the data of the corresponding location will be inserted into the tags automatically.
- In the SEO Title field, you must specify the title that will be displayed in the output. Example: "Barbershop [Name] – Stylish haircuts and beard grooming." Include the name of the barber shop and key services such as haircuts and beard care.
- In the SEO Description field, you need to specify the description of the page. Example: "Book an appointment at men's barber shop [Name] for a stylish haircut and professional beard grooming. Experienced barbers are on staff. Convenient location and a friendly atmosphere." The description should briefly highlight the main services, advantages, and atmosphere of the establishment.
An example of displaying metadata in search is shown in the image below.
After filling in all the fields, click on Save.
Preview of the store locator
A preview page will open, with the fields and filters set in the Locator Settings section. When you click on the pin on the card, a window with additional information will open. Customers can build a route to your company through the Yandex, 2GIS (URBI) and Google catalogs.
Attention! When opening the store locator, the client will be prompted to enable geolocation if it is not already enabled. After this, the list of companies on the left will be sorted based on the client's location in descending order.

To display the company card with the fields that have been set in the Card Settings section, click on More Details. You can also click on the company name in the list.
If the Open the Card with a Separate Page function has been enabled during the setup, the card will be displayed on a separate page, respectively. To return to the main section with locations, click Back to list.
If the Open the card with a separate page function was not enabled, then the card will be displayed on the same page. To return to the main section with locations, click Back to list.
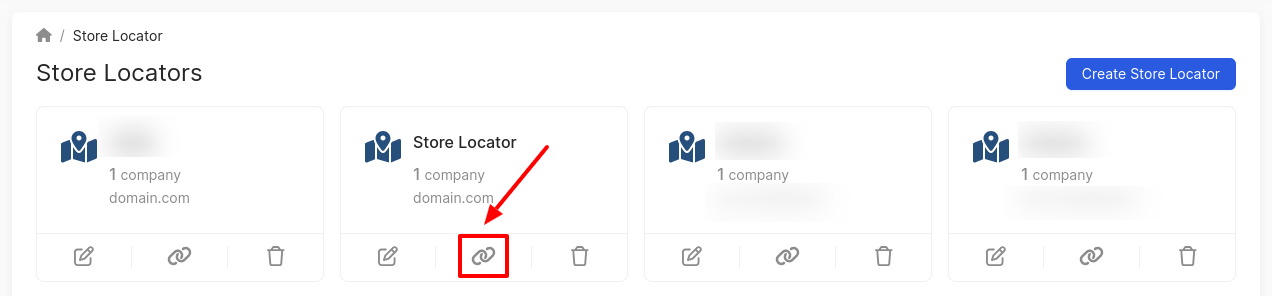
How to connect a store locator?
In the last step, you need to connect the store locator. You can also go to this page from the List of Created Locators section. To do this, click on the anchor icon in the selected locator.
To get instructions on how to connect by email, you need to click on the corresponding button.
The Send Instructions by Email window opens, where you need to specify an email address and click on Send.
Next on the page, you can find out how to embed a JS widget on your site. The store locator can be placed inside the pages of an existing website. To connect, you need to insert the code shown on the page into the code of your site. The site must be located on the domain that was specified in the Locator Creation step.
To copy the code, click on the copy icon in the corresponding field.
After setting up the connection, click on Finish.
You can find out about the Communication page further.