![logo2.png]](https://help.brandwizard.io/hs-fs/hubfs/logo2.png?height=40&name=logo2.png)
In this article, you will learn about:
- How to create/edit an event?
- What data about created events is shown in the section?
- How to view event submission details for each company?
Events are a type of publication about upcoming activities at your organization. They are suitable for announcing concerts, workshops, tours, and other happenings. In Yandex Maps, events appear in the company profile on the Overview and News tabs.
How to create/edit an event?
In the Posts section, go to the Events tab and click Create event.
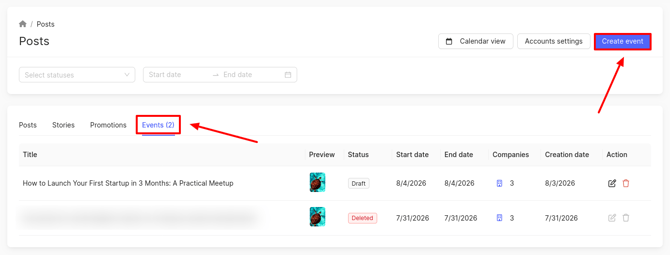
To edit an event, click the edit icon.
In the window that opens, choose how to select companies for the event:
- Select companies manually — this option lets you manually pick the companies you need.
- Select all companies of the brand — all companies of the brand are selected automatically.
If you choose Select all companies of the brand, specify the brand for the event and click Next. The event details window will open (described later in this article).
Attention! The event will not be added for companies that are not verified in the Yandex catalog. Learn how to verify here.
If you choose Select companies manually, click Next. A company selection window opens.
Select the desired companies from the list and click Next. Closed and temporarily closed companies will be absent from the list — you cannot send an event to them.
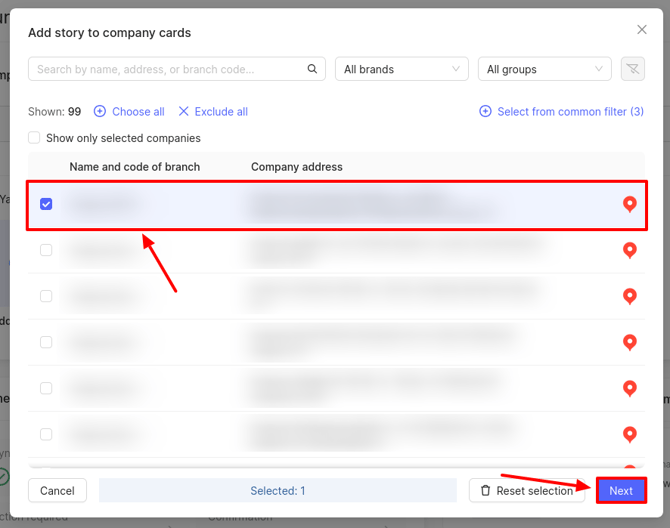
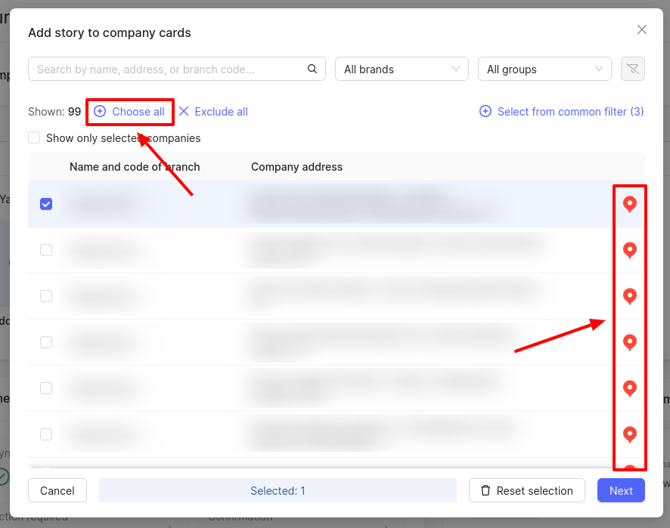
To select all companies, click Choose all.
Attention! This button will be unavailable if you have multiple brands. You must create the same event several times, selecting each brand individually. This is how the functionality works due to Yandex's business logic and limitations. Use the All brands filter to choose a brand.
A Yandex catalog icon appears in the right column of the list. If it is grayed out, make sure the source is verified. Learn how here. If the catalog is verified but the icon remains gray, contact your manager.
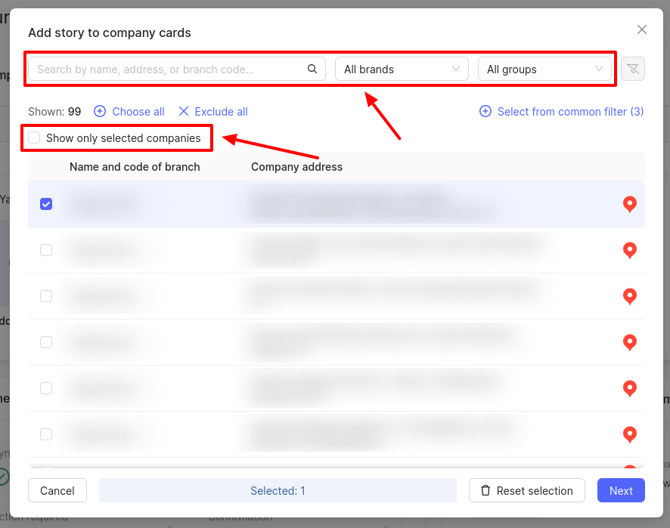
To find a specific company, use the search field by name or address, or apply filters by brands and groups. You can also view already selected companies to see which locations are missing — check the Show only selected companies box.
If you have filtered the companies you need using the top filter, you can select them by clicking Select from common filter. Learn more about this filter here.
Next, click or drag images into the upload area.
Image requirements:
- Upload no more than 4 images.
- File format: JPG or PNG.
- Size: from 320 × 160 to 5000 × 5000 px. Recommended: 400 × 160.
In the next step, fill in the event details:
- Name — enter the event name.
- Description — enter the event description.
- Type — select the event type: webinar, exhibition, etc.
- Age restriction — select an age limit.
- Start date — select the event start date and time.
- End date — select the event end date and time.
- Publish date — specify when the event information should appear on Yandex.
- Deletion date — specify when the information will be automatically removed from Yandex.
If you are not ready to publish the event yet, you can save it as a draft. To send the event to Yandex, click Publish or Schedule (the Schedule button appears if you set a future publication date).
If you were editing an event, click Update.
What data about created events is shown in the section?
Once created, the event appears in a table with the following columns:
- Title — the name you set when creating the event.
- Preview — click to view detailed information about the event.
- Status — the current state of the event. Possible statuses:
- Draft — the event is saved but not launched. It will not be sent to the platform until you publish or schedule it.
- Scheduled — delayed publication: the event will be automatically sent on the specified date.
- In progress — the event is being sent to the catalog, the result is not yet available.
- Sent — the event has been successfully sent to the catalog.
- Deleted — the event has been deleted manually or automatically upon reaching the set deletion date.
- Start date — the event start date and time.
- End date — the event end date and time.
- Companies — click to see the list of companies for which the event was created, along with submission details for each.
- Creation date — the date and time the event was created in the personal account.
- Actions — available operations: edit and delete the event.
How to view event submission details for each company?
To see detailed information per company, click the Companies column.
A window opens with a list of companies and event submission statuses:
- Pending — the event has not yet been sent to the platform for this company. It is either in the queue for sending or awaiting a retry after a previous error.
- Under moderation — the event has been sent to the platform and is being reviewed.
- Active — the event has passed moderation and is currently displayed: the current date is between the start and end dates of the event.
- Scheduled — the event has successfully passed moderation and is placed on the platform, but it is not yet visible because the start date hasn't arrived. Display will begin automatically on the set date.
- Completed — the event end date has passed, display has stopped.
- Rejected — the platform rejected the event based on moderation results.
- Deleted — the event has been removed from the platform.